
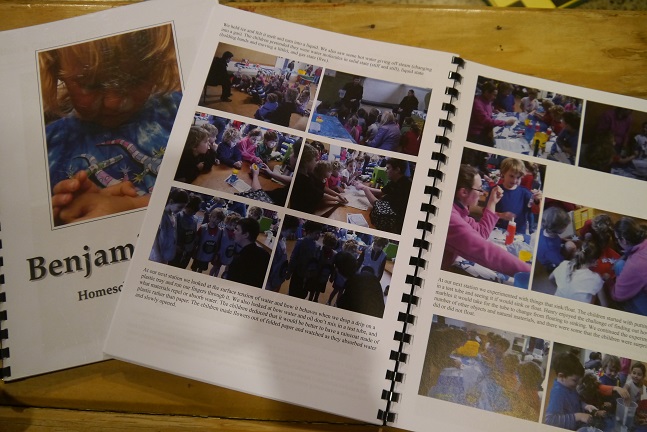
Summary: Digital yearbook created on PC then printed in colour and spiral bound; One individual yearbook per child; Three children aged 9yrs, 7yrs, 6yrs; Unschooling approach to home education
Having gone through Playcentre with my three children before home educating, I was quite used to writing learning stories for their Playcentre journals. I noticed that my children loved looking through their journals, marvelling at the photos and what they did earlier that year. When we started ‘officially’ home educating I decided to continue this tradition and keep a Home Education Yearbook for each child. From time to time the format has changed a bit, I used to link our learning to the NZ curriculum subject areas but I have let that slide and at the moment it is a week-to-week record of activities and learning – basically a bunch of photos and short blurbs about what we do.
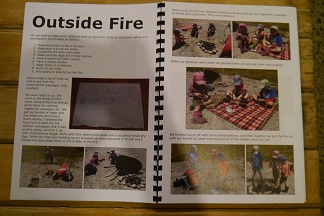
I always have my camera with me and take photos of what the children are up to – whether it’s at home or out and about. If they produce any particular writing, art, maths, or other work, I also photograph that. I note major discussions we have, sometimes I carry a notebook in my bag so I can write down what we talked about and any particular comments each child made. I also note down documentary DVDs we’ve watched, movies, places we go, new things we try, etc. I have my children in mind when doing it and try to make it an interesting document for them to look back on when they are older. It’s not a diary though, I don’t record everything we do in a week – for example, when we go to our Wednesday afternoon sports group (which we’ve been going to for over a year), I don’t write that down every week; I just put it in the first time for the term, or the last, or one session when I might have taken some photos, or a time when one of my children had a breakthrough in a particular area at sport.
I rely on photographs to jog my memory and I usually update the yearbooks once a week (downloading pics off my camera and importing them into each document). As my children tend to do the same activities, I often copy and paste between their books. I end up creating an average of two or three pages per week (each child), the vast majority of that is photographs. I usually keep it up over the school holidays, especially if we have some fun things planned. I also document our family holidays. I use LibreOffice Writer (which is a free program, similar to Microsoft Word) – I’ve tried using specific story-type programs but I prefer the flexibility of layout provided by word processing software.
At the end of the year I email a couple of printers for quotes, then I drop my documents in on a flash drive and get the books printed (A4, double sided, colour) and then I bind them with simple spiral binding. It costs about $50 per book (approx 140 pages double-sided for each book). If money is tight then I budget for it well before the end of the year.
I admit that I have always enjoyed documenting our ‘life’ – scrapbooking, dairies, journals, etc – so it was quite natural for me to do a yearbook for each child. I’m also pretty confident on a PC doing formatting and layout. The children love seeing their yearbooks which I give to them at the end of the year. They are amazed at all we have done and how much they’ve grown and learnt. The books then lie around on the coffee table for a couple of months so the children can show grandparents and other family members (there is nothing like three full books of “proof” to reassure anxious relatives that my children are learning all the time!!).
If you are thinking about doing a yearbook then here are my tips:
- Consider your motivations. If you are doing it for any reason other than to provide a valued family record then you probably won’t stick to it and it will become a chore.
- Consider when you will work on it each week.
- Make sure you have a camera you can take everywhere.
- Use a layout program that makes things easy for you.
- Budget for the printing if necessary, as you don’t want to do all of that work and then only view it on the PC.
Summary: Hand-written yearbook on pre-printed forms, pre-bound and filled in over the course of the year; One yearbook for the whole family; Three children aged 10yrs, 9yrs, 6yrs; Eclectic approach to home education
I have been doing a homeschool yearbook type thing for the last few years. We loosely follow the school terms and I tend to have some sort of plan based on the kids interests, this can involve workbooks or be self directed. We take the third term of each year ‘off’ as we are dairy farmers – so we are more focused the other three terms to compensate. I have just the one all-encompassing book, kind of like a family story. I do it by hand, not on the computer – I started doing it on the computer at the beginning but it just didn’t work for me as often I will jot things down in it in a spare moment. I do it for most school weeks of the year and just leave plenty of blank pages to stick extra things in that have some significance – like holidays snaps, brochures, random notes, or art that I want to keep. The book has evolved over time to suit my style. It started as a bit of validation that the kids are learning all the time and, by recording things, I became aware of just how much learning was going on. I also thought it would be valuable to have if I ever had an ERO review.
I use templates, some of which I designed myself and some from DonnaYoung.org. At the beginning of each year I print out all the pages on our home computer and have them bound at Warehouse Stationery (costs about $7 I think), divided into four terms and ready to fill out. So at that stage it’s just a blank book/dairy-type thing. The photos are just printed out on our computer and glued in. It’s my Sunday evening job.
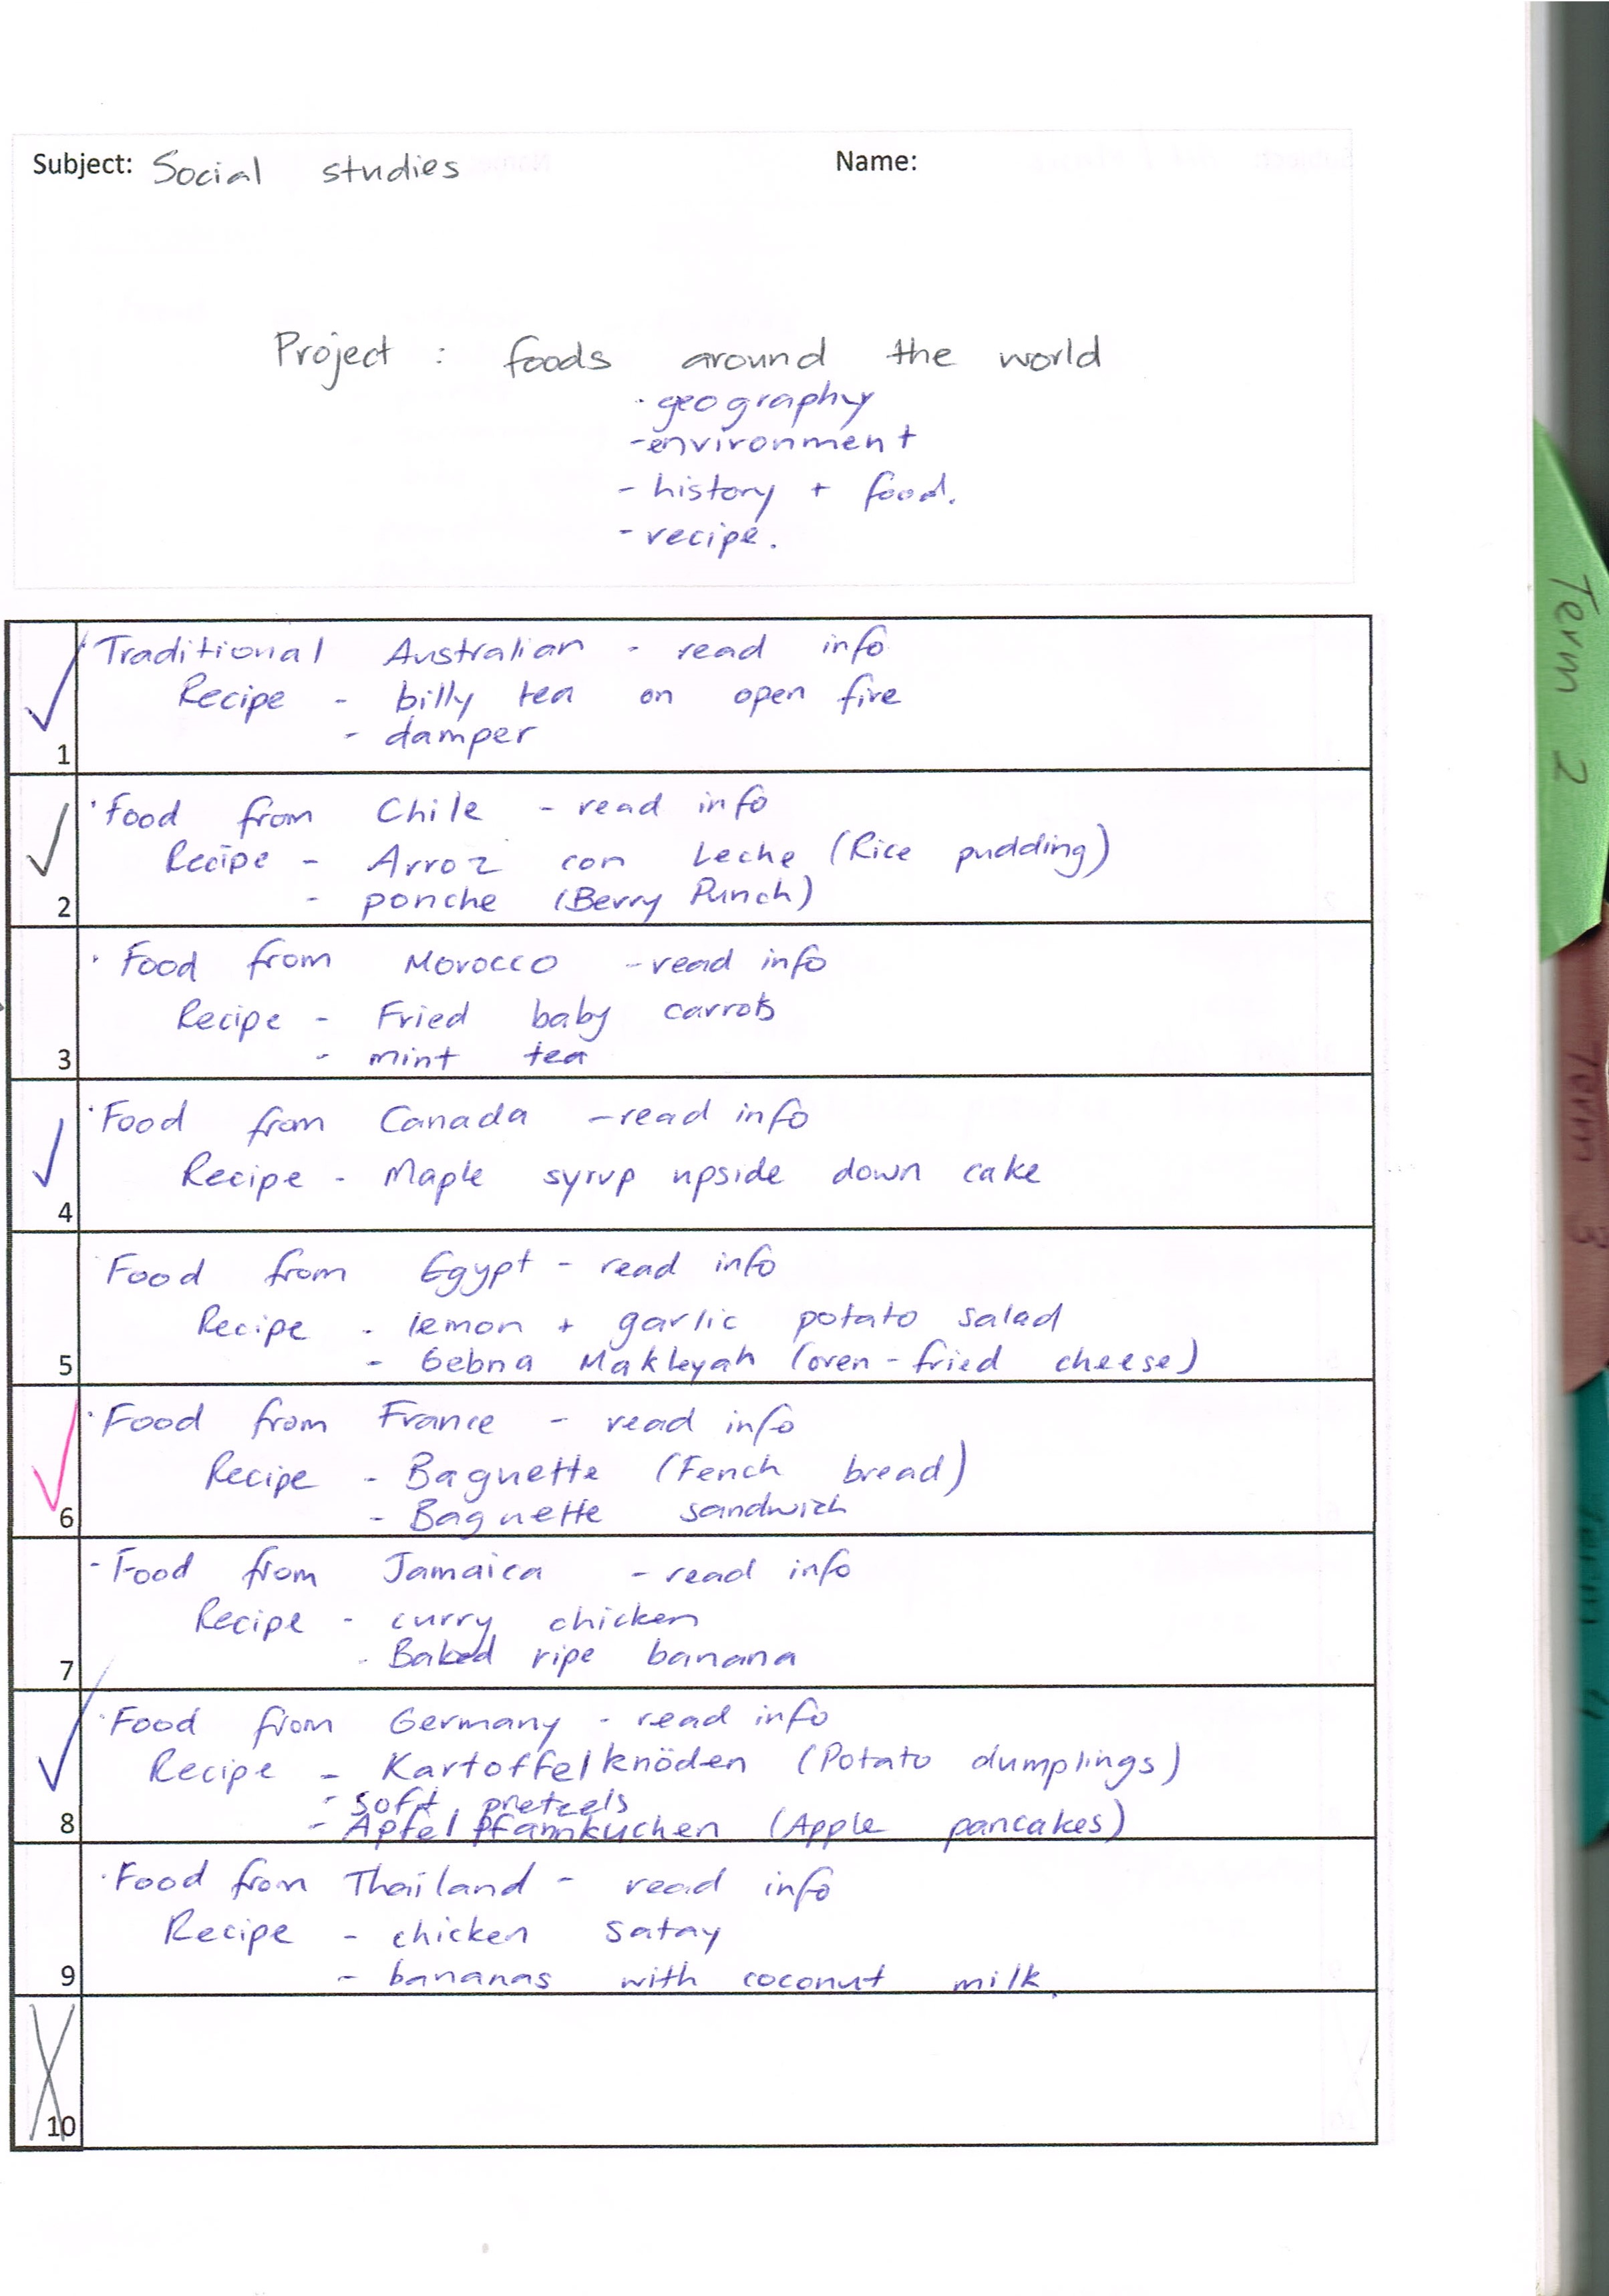
The first pages in the yearbook are my planning pages for the term, this helps me ensure I have the right resources on hand. I have one for each subject covering the ten weeks of the term. I’m not a strict planner, but I find if I spend time doing some ground work then I’m ready to go.

Following the planning pages is a weekly page for each child recording what we actually did in all of the subject areas – this is our record of learning. Of course there is plenty that’s not recorded, but I try to record the important/meaningful stuff.
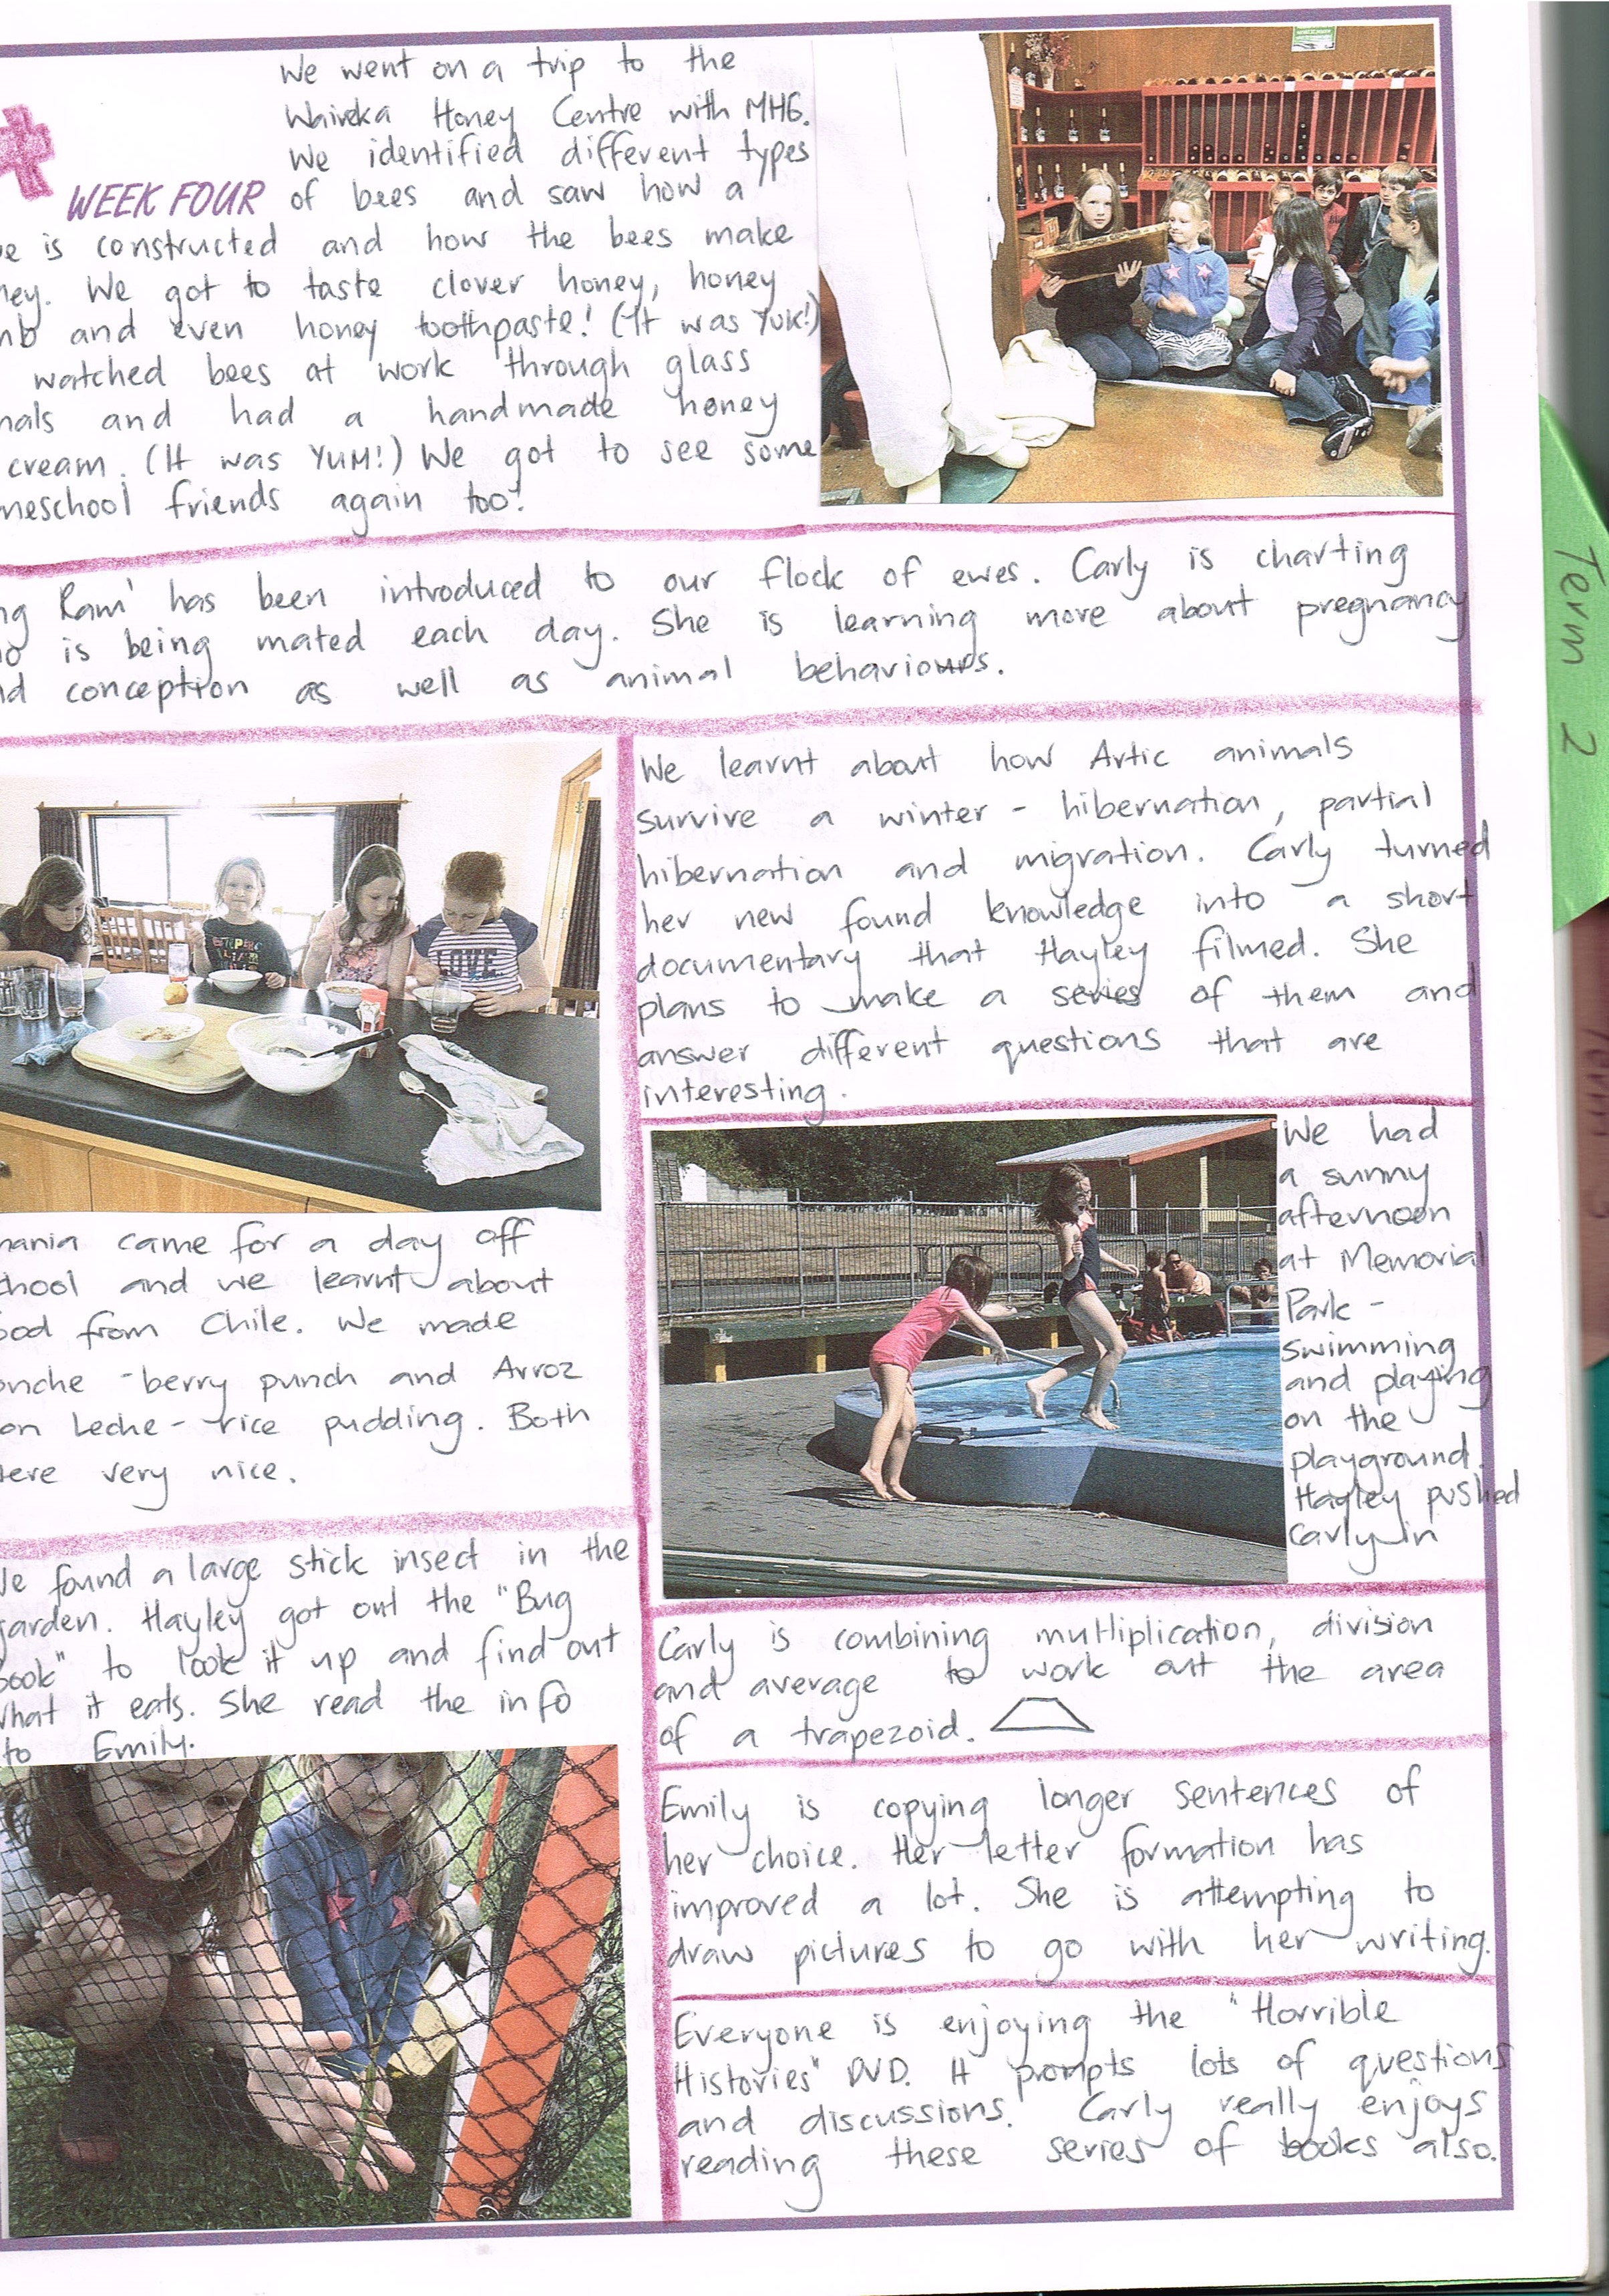
Then I have the page I do at the end of the week (my favourite part). This page is decorative with photos capturing the week’s highlights, this ensures our yearbook is not just “bookwork” based. I include photos of art, snippets of writing, maths, etc. We sometimes pull out these books and look over these pages because they hold so many memories.
It is such an inspiration to look back on and realise we have done so much (especially when I feel like we are getting nowhere). Now that I have done it for a few years, I’m so glad I did. It also saves me from keeping a whole heap of work/art the kids have done. It’s also awesome to pull out to show people who might be “disbelievers” lol!
My top tips? Make your yearbook easy and accessible to fill in so that it’s not a chore; and make it work for your learning style.
It’s become quite an accolade in our house for the kids to get their work/photo published in my homeschool book and they are always proud to see themselves in it!